Sound-and-music-reactive-ESP8266-WS2812B
Refined Version of @scottlawsonbc and all schematics + Tutorial 🎵🎵
View the Project on GitHub AnshumanFauzdar/Sound-and-music-reactive-ESP8266-WS2812B


Music Reactive WS2812 LED Strip via PC and raspberry with ESP8266
Want to enjoy some music reactive without any hassling wiring and microphone like stuff along with arduino, then this will be perfect for you!
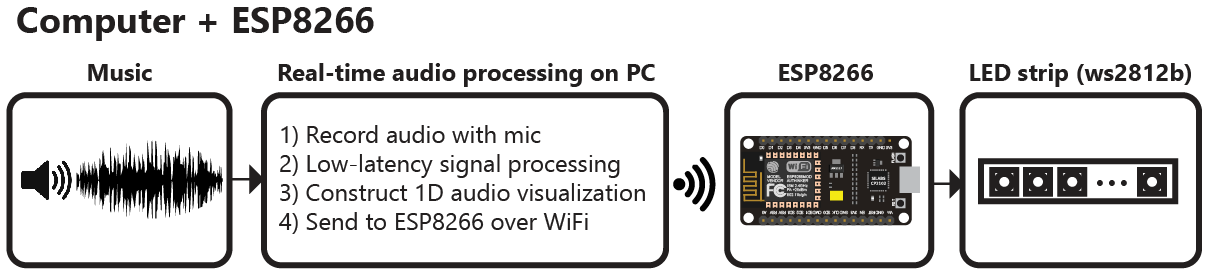
This project utilises sound/music from PC and process it accordingly and send over wifi to ESP8266 device.
Parts, tools, softwares required:
Hardware Required:
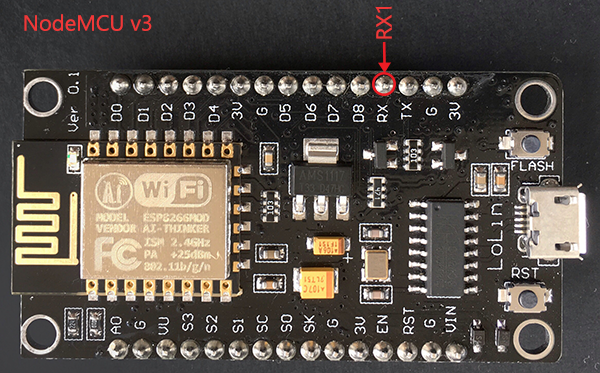
- ESP8266 (I have used NodeMCU)
- Programmable LED Strip (I have used WS2812B)
- Laptop/PC
- Raspberry pi (Not covered in this documentation, I have raspberry pi but do not have usb-sound card)
- Wiring, resistors-capacitors for avoid burning your WS2812 or ESP8266.
Software Required:
- Arduino IDE for flashing code to ESP8266
- Anaconda installed on PC (https://www.anaconda.com/download/) for python environment.
- Working condition PC for all processing stuff with working sound card!
Tools Required: -> Basic knowledge is required
Download this repository and save according to your ease of access
How things are working?
The repository includes everything needed to build an LED strip music visualizer (excluding hardware):
Python visualization code, which includes code for:
- Recording audio with a microphone (microphone.py)
- Digital signal processing (dsp.py)
- Constructing 1D visualizations (visualization.py)
- Sending pixel information to the ESP8266 over WiFi (led.py)
- Configuration and settings (config.py)
- Arduino firmware/code for the ESP8266 (ws2812_controller.ino)
So, music/sound is processed and hence signals are transferred to ESP8266
ESP8266 recieving signals:
Configuring Arduino and Anaconda
Arduino IDE
- Install latest Arduino IDE from “https://www.arduino.cc/en/main/software”.
- Install all dependencies and libraries which include ESP8266 boards, ESP8266 libraries, FastLED, Neopixel Library, Neopixel BUS library.
- Get all the libraries ready and flash your ESP8266 from board selection choice.
- If there is any error while flashing, look into the error and install the corresponding library!
- Upload the code and verify that ESP8266 is connected to your Wifi or not
Anaconda
- Once you have installed anaconda we need to create the environment AKA the workstation through which this will work!
- You can create conda environment thorugh base(root) terminal or just by pressing “Create” button
- when you are creating through base(root) use “conda create –name visualization-env python=3.5”
- activate visualization-env
- Now we have to install several dependicies to able to work:
- conda install numpy scipy pyqtgraph
- pip install pyaudio
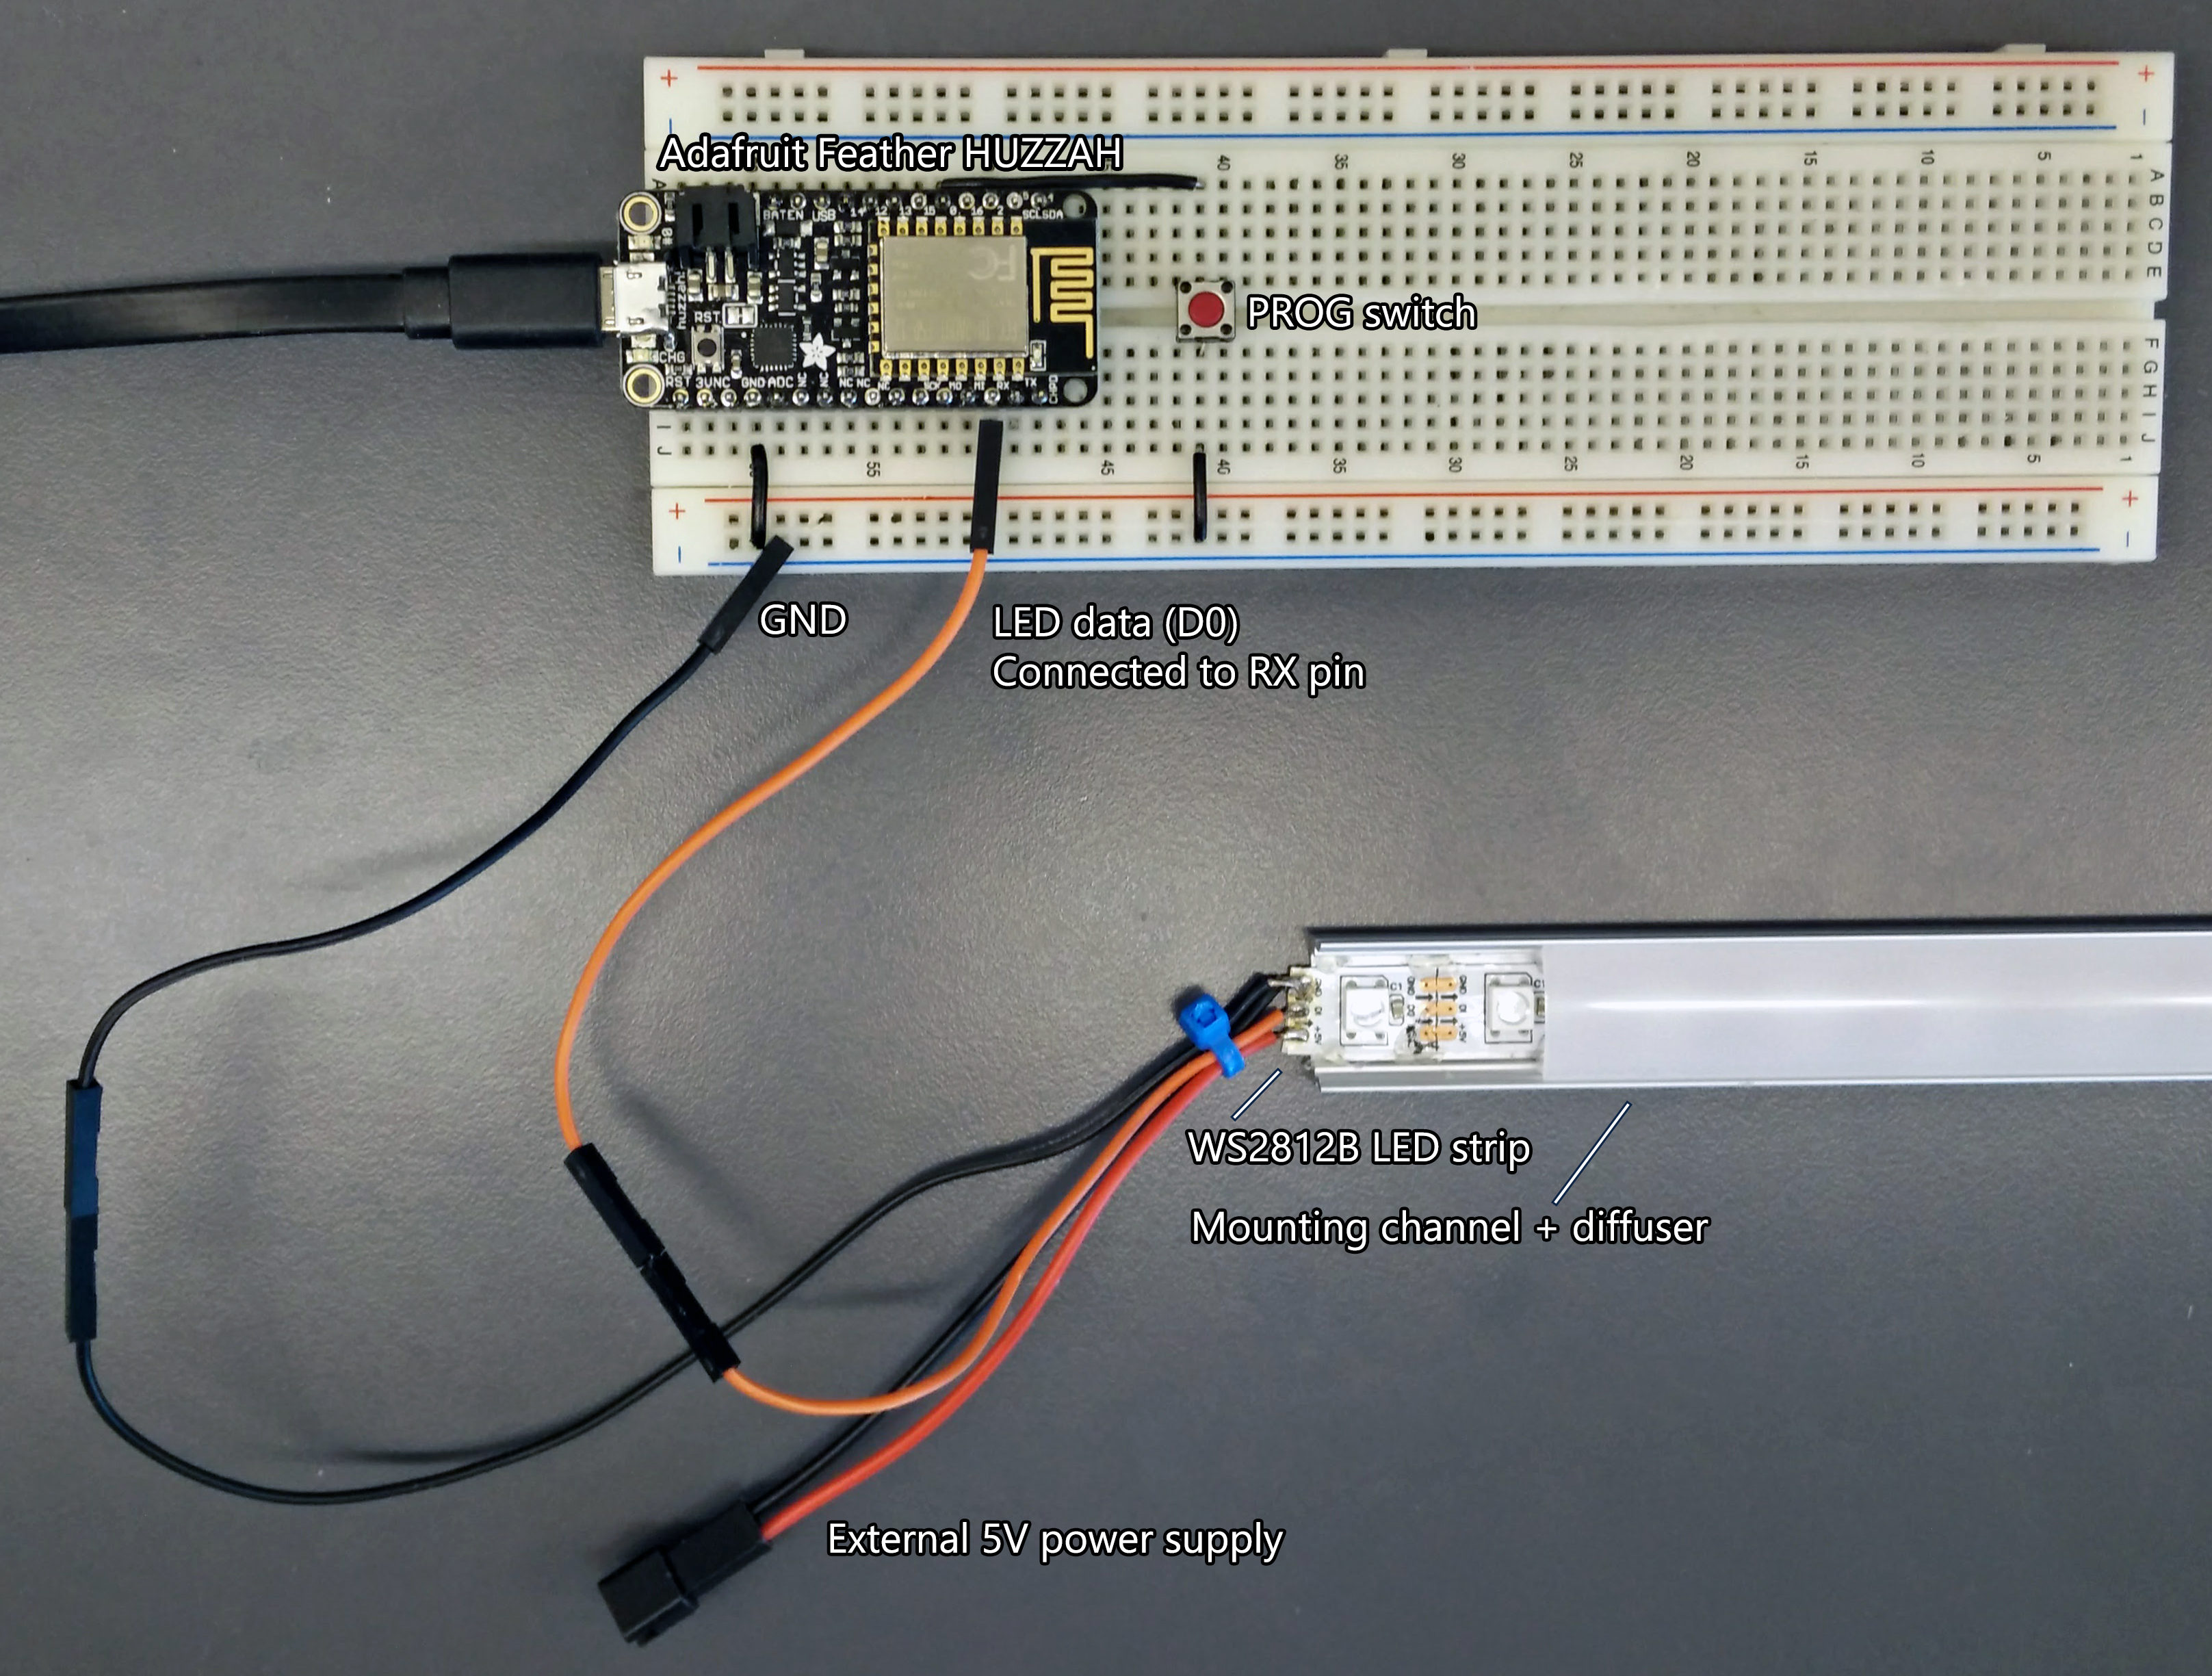
Connections
ESP8266 connection edit out pin output according to your requirement in (ws2812_controller.ino)
Connection WS2812 with care is important as they are very sensitive to voltage change and you can easily burn them!
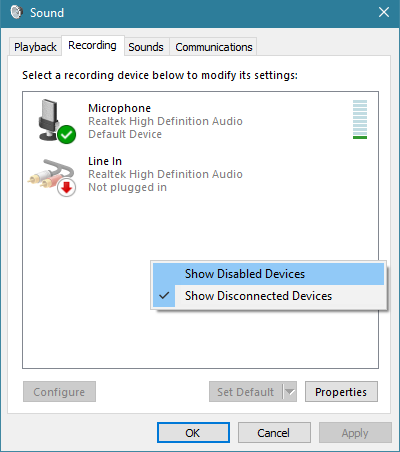
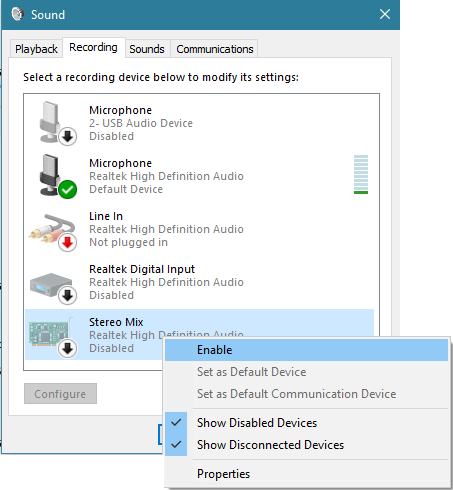
Sound selection
Stereo sound is preffered if you want to utilise music from your PC not from micrphone of PC
So, select stereo connection from sounds properties, and if it is not showing up - right click and check for disabled devices, if still it doesnot show you can use third party software like “VoiceMeeter”.
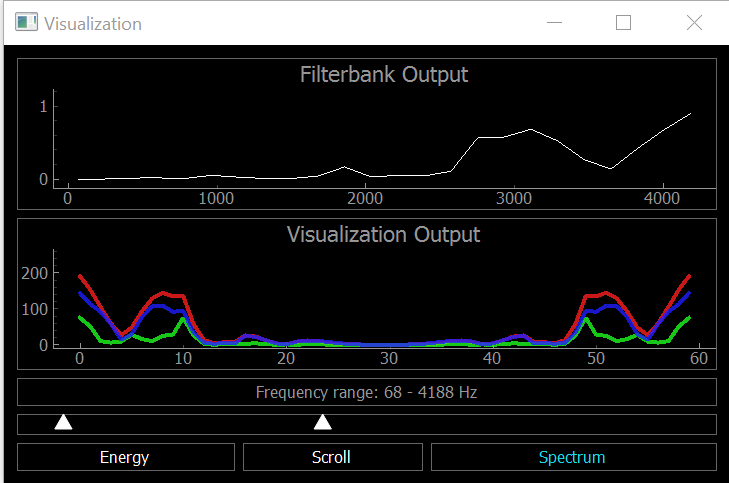
Last But Not Least - Run the visualisation
Once you have done all this and flashed code to ESP8266 without any error, then run the environment and go to directory where you have downloaded this repository For ex- If you are in E drive and python folder is saved like this “E:\DATA\AURDINO PROJECTS\Music Reactive\audio-reactive-led-strip-master\python” then by “cd E:\DATA\AURDINO PROJECTS\Music Reactive\audio-reactive-led-strip-master\python" change to this directory and then “python visualization”.
Boom! Enjoy the visualization and make your room sync to music, adjust the frequency slider according to your requirement!

Project Credits:
This is refined Version of (@scottlawsonbc) and all schematics + Tutorial and all the errors and instructions covered
Arduino refined code is by (@joeybab3), (@gorgitko)
Themed Version is available at “https://anshumanfauzdar.github.io/Sound-and-music-reactive-ESP8266-WS2812B/”
# Current Status: I have moved my LED strips to TV frame and using WLED for daily use and LEDFX for music reactive purpose and it works great, but if you want to use more cool effects and dedicated to music reactive then use this project and do share with others!